Mind Map Anywhere
I'm often asked how I'm able to mind map in a tiny space like a Traveler’s Notebook.
It certainly didn’t happen over night.
But once you master the basic skills, you’ll be able use this powerful tool anywhere. Even a napkin becomes a mind mapping medium (true story). Epiphanies wait for no one, so you better be ready to capture them.
I’ll walk you through my progression from giant whiteboards to the tiny TN. In the process, I’ll also share some tips to make hand drawn maps work for you.
PAPER SIZE
In Mind Mapping Fundamentals, I recommended three paper sizes for hand drawn maps:
“Below are the three sizes I recommend, going from largest to smallest. Generally, the less space you have, the more skilled and disciplined you will need to be with mapping.
Letter (8.5” x 11” or A4 if you’re outside the US and Canada): This is a good starting point with plenty of room to expand in all directions. It’s also the most common and readily available medium for mind mapping.
Moleskine Classic Soft Cover XL Notebook (7.5” x 9.5”): This is an excellent mind mapping notebook for working professionals because of its generous size (expandable to two pages “wingspan” for large projects), enough pages for 3-6 months of intensive daily mapping.
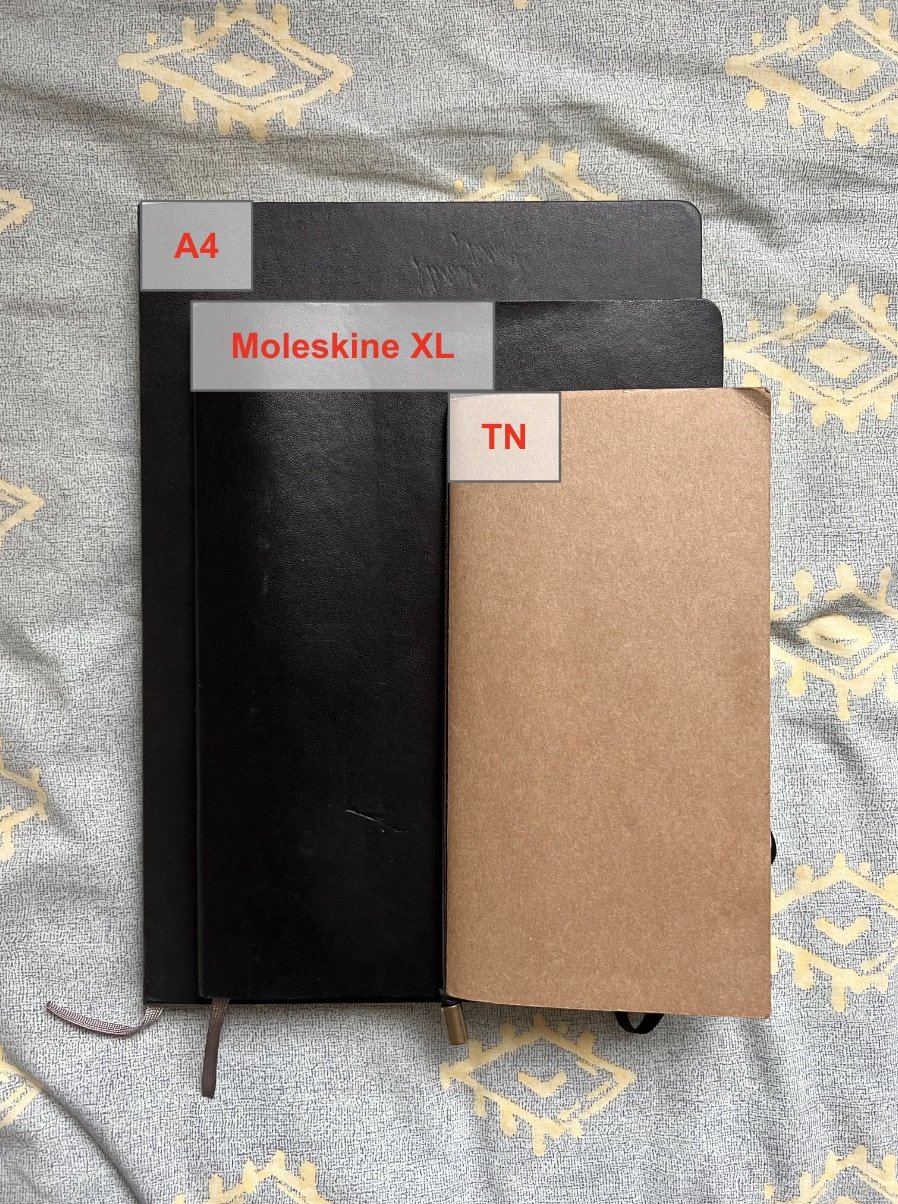
Traveler’s Notebook or TN (8.5”x4.5”): This notebook is small but mighty, and the one that I use now for hand drawn maps. The advantages of this notebook are the inserts. The tiny footprint will take some getting used to, so I recommend getting some practice first with larger notebooks and working down to this size.”
I’ve stacked them for size comparison:
MY PROGRESSION
Here’s my progression from 2016 to the present day:
What’s not shown is that I first started drawing mind maps on giant whiteboards in college for consulting projects and internships circa 2008. I then moved to printing paper as a portable whiteboard. I always had a small stack of folded 8.5x11’s stashed in my backpack. Whiteboard + printing paper + smartphone (for taking pics of maps) was my modus operandi for ages.
And boy did I go through a lot of paper! The printing papers were sometimes taped together at the edges for bigger maps. Erasable pens didn’t come into the picture until an MBA classmate introduced them to me in 2014.
I finally invested in a nice hardcover A4 Moleskine notebook in the summer of 2016 during a 6-month sabbatical to capture my research and thoughts as I was figuring out life and career. While I appreciated the vast space this notebook afforded me, it is only <25% filled because…
Once I started working again I found the giant notebook to be too bulky to carry. It’s like walking around with one of those fancy heavy stock magazines all the time (it’s thicker than a 13” iPad Pro!). More importantly, it gave too much mapping space. Once you get the hang of hand drawn maps, a smaller space actually focuses your attention and reduces the anxiety to fill blank spaces.
I found a happy medium with the 7.5”x9.5” blank softcover Moleskine XL. It looks professional, has a pocket in the back for miscellaneous paper mind maps and business cards, and holds my Frixion pen inside with the rubber band. It fit snuggly into my bag for travel and was easy to carry around for meetings. One page is usually enough for most maps, but sometimes I’d draw across two pages for more complex strategic thinking and planning sessions.
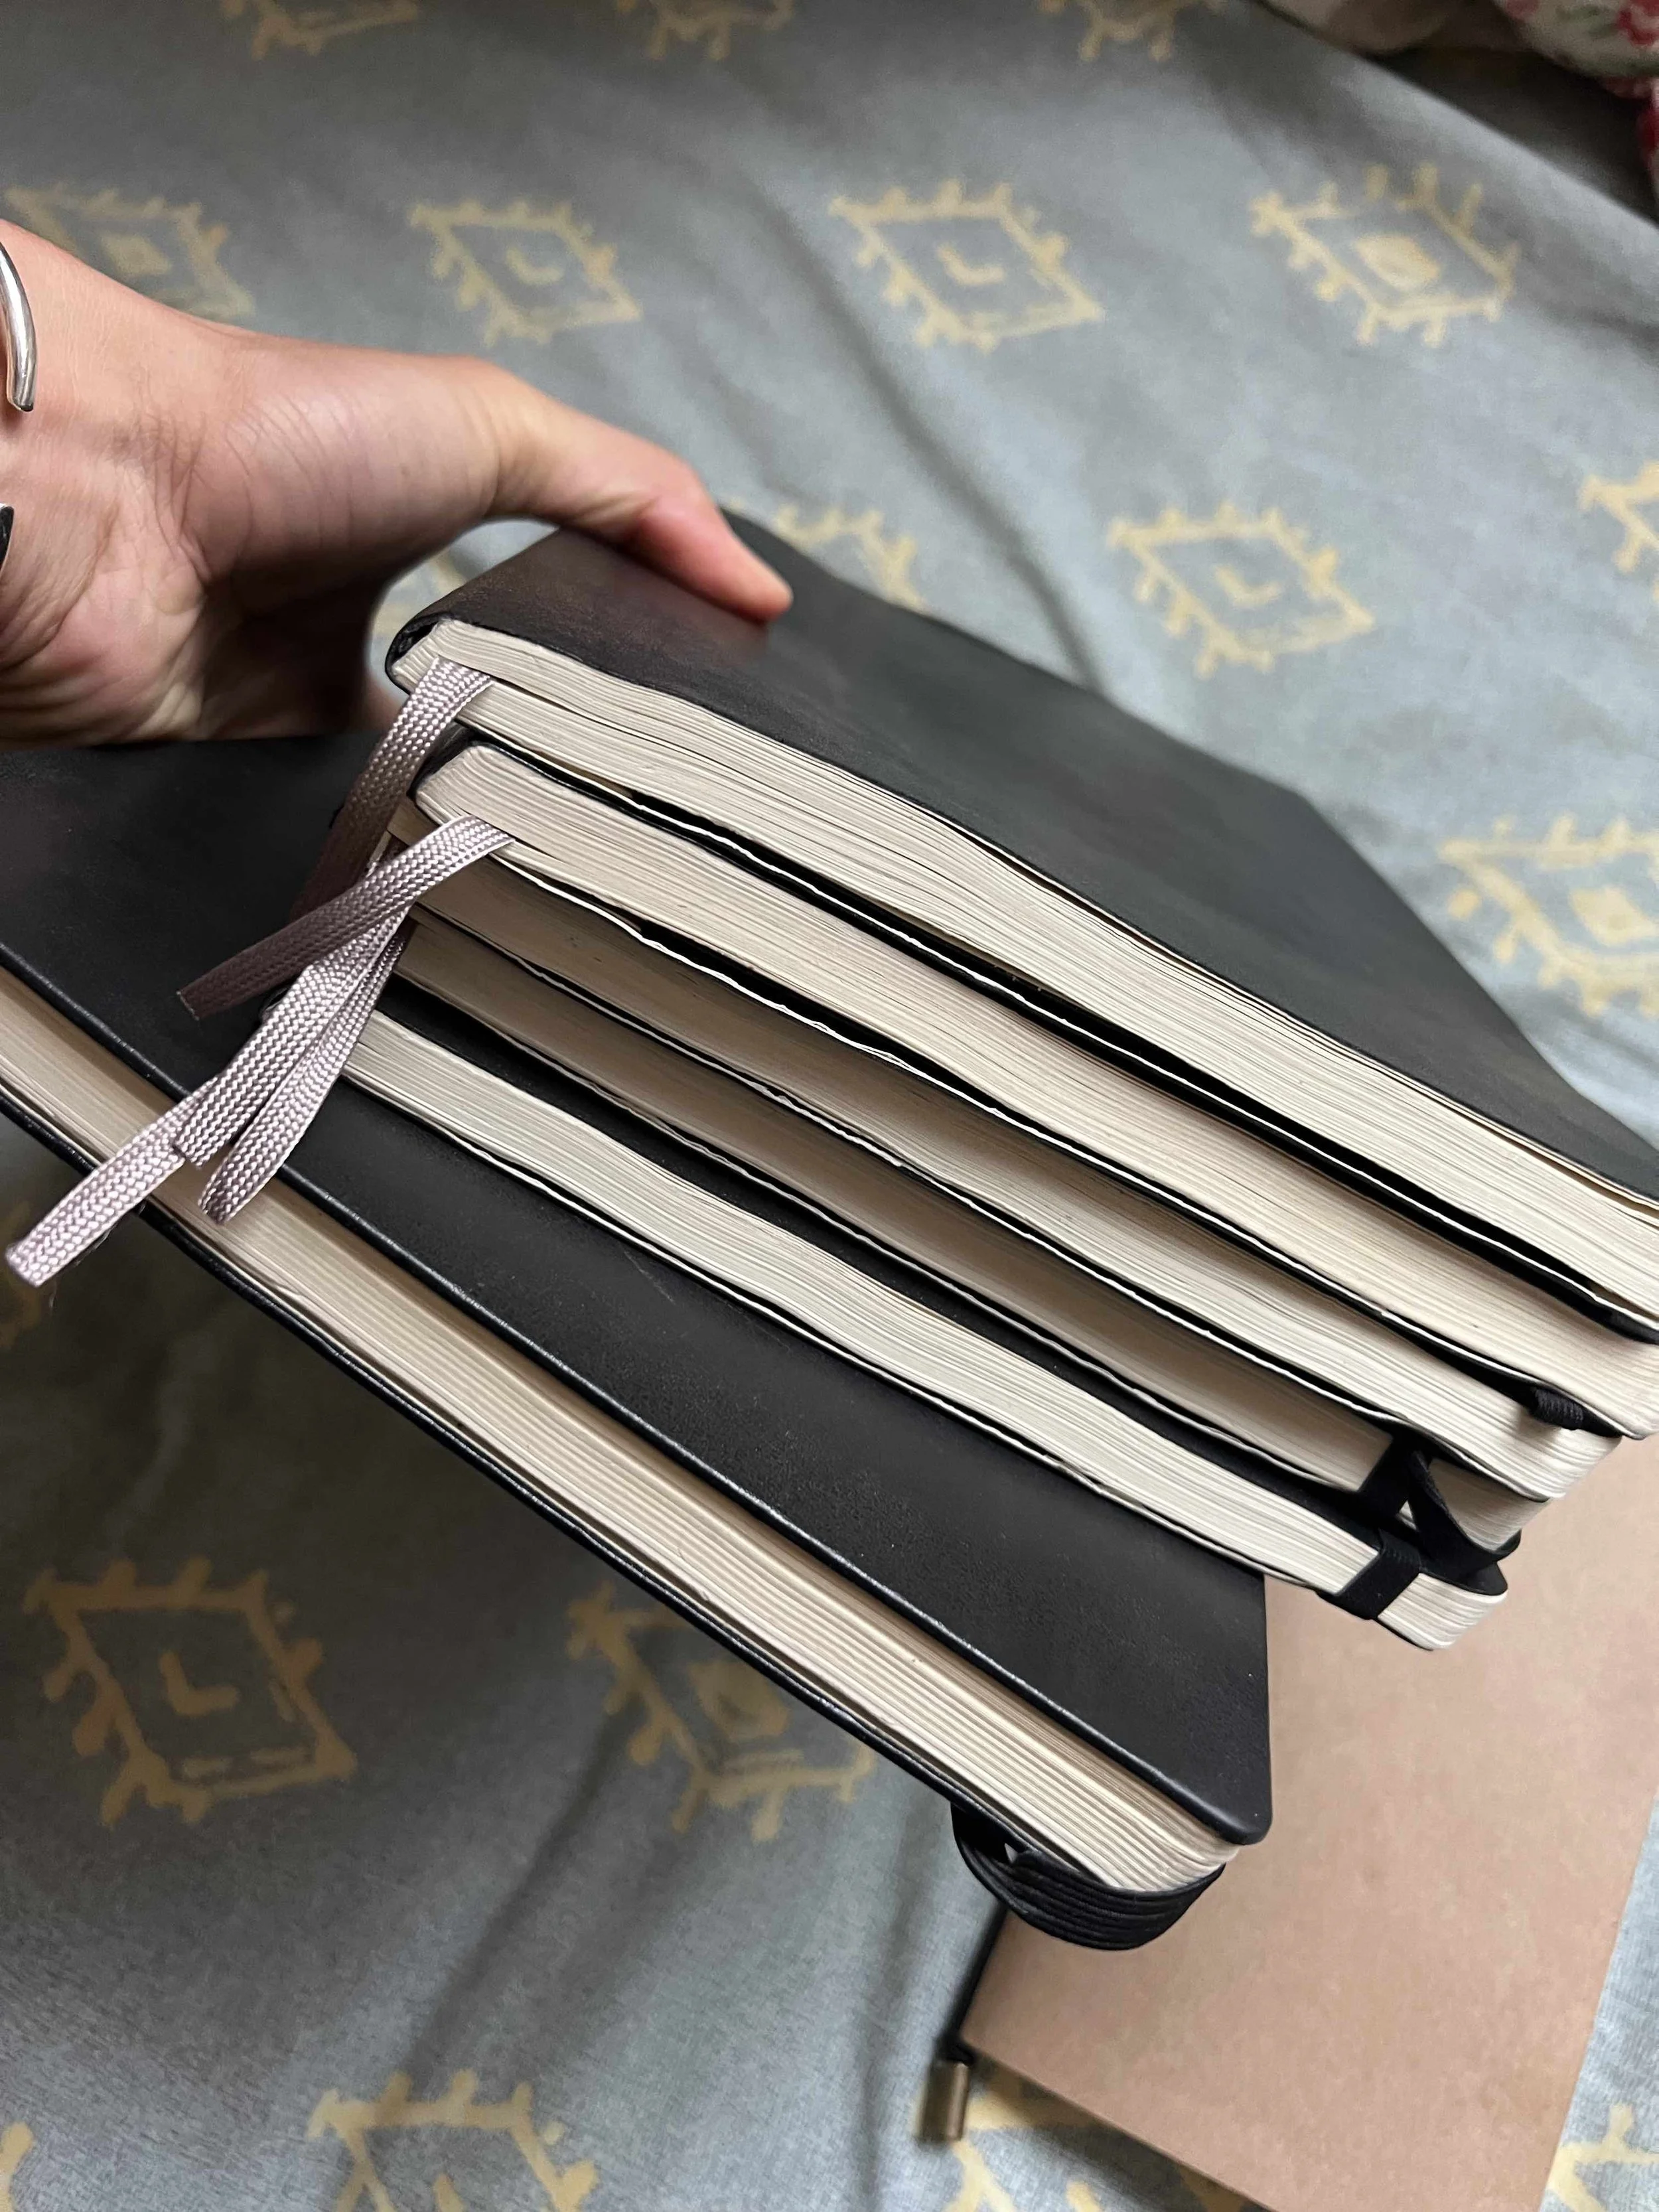
Here’s the stack of old mapping Moleskines off my shelf.
This is only half of the notebooks I went through in my last corporate role!
This system worked for 4 years until it was replaced by:
1) iPad + Notability combo for work (2019)
Notability emulates the bounded, rather than infinite, canvas of a notebook, has colored pens, and the ability to select, resize and move portions of the map around.
It’s also great for collaboration because I can copy and paste my maps from iPad to Macbook directly into apps like Slack, Gmail, Notion, and, these days, to MMN.
This is my go-to for meetings because I don’t have to worry about space constraints, can freely move elements around, and quickly share maps to colleagues and clients.
2) Traveler’s Notebook for general mapping (2020)
I was still using Moleskine XL’s well into late 2020 until I discovered Travelers Company, the makers of my TN, at a Japanese fair in Denver. I instantly fell in love with its form, function, and customizability.
These days, it is my go-to for general hand drawn maps like to-do’s, reflections, and sprint planning. I cover TN mapping tips in this tutorial video. I also use it for real time conversation mapping in a pinch.
PRO TIPS
While we’re on the topic of mapping space, here are a few tips to help you adapt to page constraints:
1) Use the full spread Mind mapping is about flowing with your thoughts. So if your notebook size is squeezing your ability to express yourself, then you need to move to a bigger page.
We have several digital mappers in MMN who noted that apps give them the room to fluidly expand their thoughts. In contrast, they felt the Traveler’s Notebook was uncomfortably cramped, thereby defeating one of the key benefits of mapping.
Don’t be afraid to draw your map across both pages. For some of my maps, I’ll start on the left page and purposefully leave the right page blank. This gives me the option of spilling over in case I need more room.
My 2-Week Sprints are the perfect example of this.
2) Match the scope to the space
If a full spread doesn’t alleviate your space problem, then you’ll need a larger page size. This also involves thinking through the nature of your topic. Generally, the more chaotic the topic or setting, the more space you’ll need to run.
This is why I rarely use the tiny Traveler’s Notebook for meetings that span an hour or more - unless necessary. Meetings in particular are extremely chaotic because I never know what’ll be covered by whom in what sequence. The Moleskine XL, A4, and iPad are better for this use case.
If I can’t roughly anticipate my map’s size, then I’ll opt for a bigger space rather than bumping against the wall later and constraining my creativity or comprehension ability.
3) Practice mapping on a larger page
As I wrote in the Fundamentals book, “Generally, the less space you have, the more skilled and disciplined you will need to be with mapping.” I started with giant whiteboards > taped-together printing paper > A4 > Moleskine XL > TN.
Starting with the TN is a fine way to begin your analog mind map journey. Just be aware of its size constraints, pick topics suitable for its limited real estate, and draw across the full spread to avoid disappointments when you first start mapping!
4) Know the limits of analog maps
Sometimes even iPad maps don’t cut it. I move to digital maps when I:
Need an infinite canvas for big projects that’s updated over time as new information comes in (ex: designing a product or research project).
Have blocks of text attached to nodes (ex: writing a book or copy for websites).
Have rich media like images and URL’s attached to nodes (ex: design audits).
Need to share maps during meetings with multiple people. I don’t expect everyone to be able to read my hand writing!
Collaborate with teammates or clients in real time over web-based mapping apps like Mind Meister.
These are the top reasons and I go into deeper detail about digital maps in the last portion of Fundamentals.
I'm a huge proponent of hand drawn maps because the best mind mapping medium is the one you have with you. Paper and pen is always readily available. They make up the vast majority of the maps I create. My notebook is truly my "second brain". I hope you'll be able to take advantage of this powerful tool as well!
Make the most of your mind maps
Thanks for reading this article. If you found it useful, you can get a new mind map in your inbox every week. Epiphany is your dose of structured thinking and ordered chaos.


